Initializing the Scheduler CSC
Most of the startup operations described here are done through LOVE, using the ATQueue, the ASummary State and the AT Summary State views (links are only accessible internal network, e.g., LSS-WAP, VPN, etc). We concetrate on the Auxiliary Telescope Scheduler for now because, at the time of this writting, it is the focus of operations. Nevertheless, as pointed out in Scheduler Operational Procedures, the processes are similar for both schedulers.
As with other CSCs, the Scheduler is configured when transitioning from STANDBY to DISABLED.
In addition to configuring the scheduling algorithm, the CSC also configures a number of ancillary modules and operation modes.
For an overview of the full set of parameters see the Scheduler CSC configuration documentation.
Determining Configuration
Important
In general the run manager will agree ahead of time on a set of configuration labels that will be available during a run. These labels should be written down in the run planning page (currently done on confluence).
The following procedure shows how to verify the available labels.
For now it suffices to say that, before enabling the CSC, the user must know in advance which configuration should be used for the night. During commmissioning it is likely that we will have more than one suitable configurations for every single night, that prioritizes different surveys that can be selected dependending on the conditions. These will, in general, be in the form of a configuration label.
The available labels (and associated configuration files) can be found in the Scheduler configuration directory of the OCS configuration repository.
This information is also published by the CSC in the settingVersions event, which can be inspected via SAL from a notebook in nublado or in the EFD from chronograf.
From a notebook one would do something like:
import logging

from lsst.ts import salobj
logging.basicConfig(level=logging.DEBUG)
domain = salobj.Domain()
Below, note the use of index=2, which means AT Scheduler.
For the MT, we would use index=1.
remote = salobj.Remote(domain, "Scheduler", index=2)
await remote.start_task
setting_versions = await remote.evt_settingVersions.aget(timeout=5)
print(setting_versions.recommendedSettingsLabels)
From chronograf, the following query would also give you the latest available labels (again, note we are explicitly specifying AT Scheduler by selecting "SchedulerID" = 2):
SELECT "recommendedSettingsLabels" FROM "efd"."autogen"."lsst.sal.Scheduler.logevent_settingVersions" WHERE "SchedulerID" = 2 ORDER BY DESC LIMIT 1
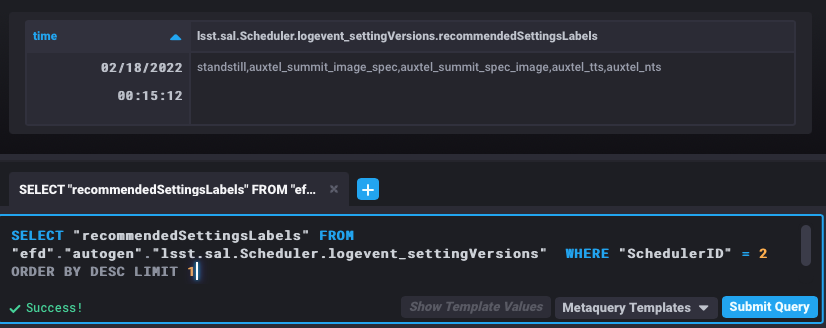
Latest AT Scheduler setting versions labels from chronograf
Setting CSC Log Level
Before starting, it is recommended to set the Scheduler logging level to DEBUG.
This can be done from the using the ATQueue LOVE interface by executing the SAL Script run_command.py with the following configuration:
component: Scheduler:2
cmd: setLogLevel
parameters:
    level: 10
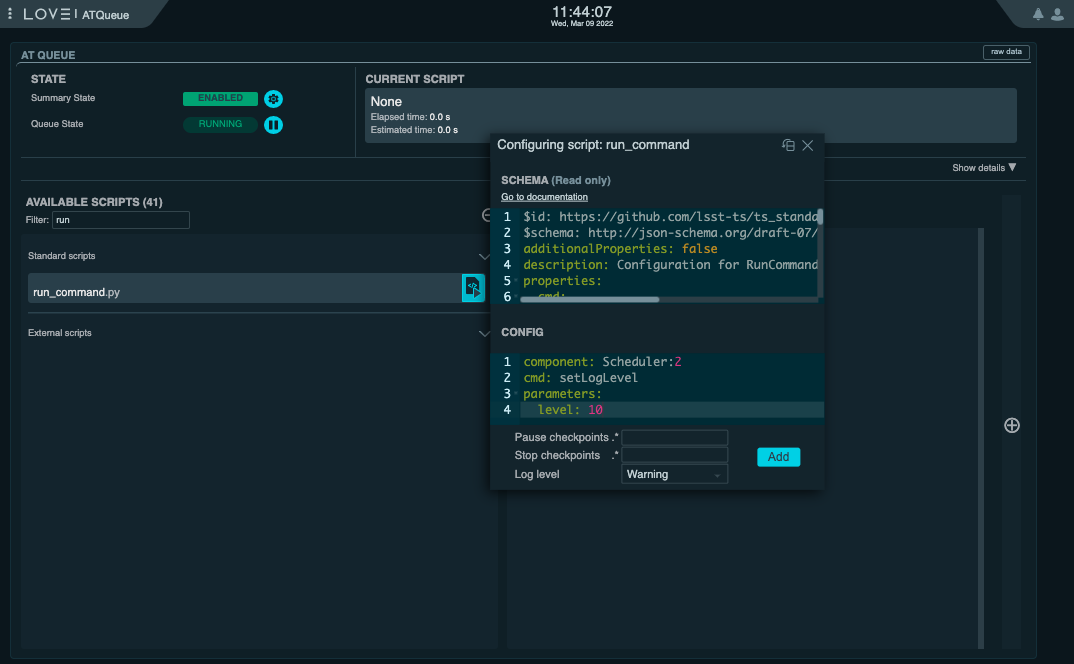
Setting log level of the AT Scheduler from the ATQueue view on LOVE. The “Log Level” dropdown menu at the bottom of the “Configuration” widget allows one to chose the log level of the Script that will be executed on the Script Queue. It is import to keep in mind that this is different than the log level of the Scheduler CSC we are about to set when running this Script.
It is also possible to do this from nublado with:
await remote.cmd_setLogLevel.set_start(level=logging.DEBUG, timeout=5)
Enabling the Scheduler CSC
Next we can transition the Scheduler CSC to ENABLED state.
If the CSC is already in ENABLED state, you may want to send it back to STANDBY to make sure it will be configured with the set of parameters we want.
From the ATQueue, this can done using the set_summary_state.py SAL Script with the following configurations:
data:
  -
    - Scheduler:2
    - STANDBY
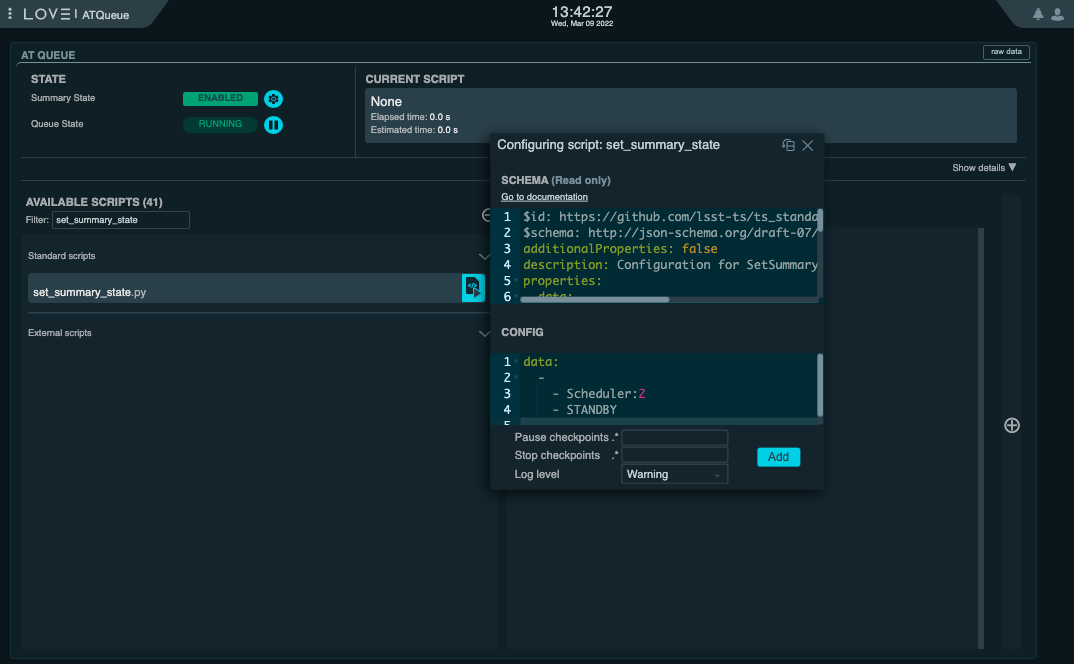
Setting log level of the AT Scheduler from the ATQueue view on LOVE
data:
  -
    - Scheduler:2
    - ENABLED
    - auxtel_summit_image_spec
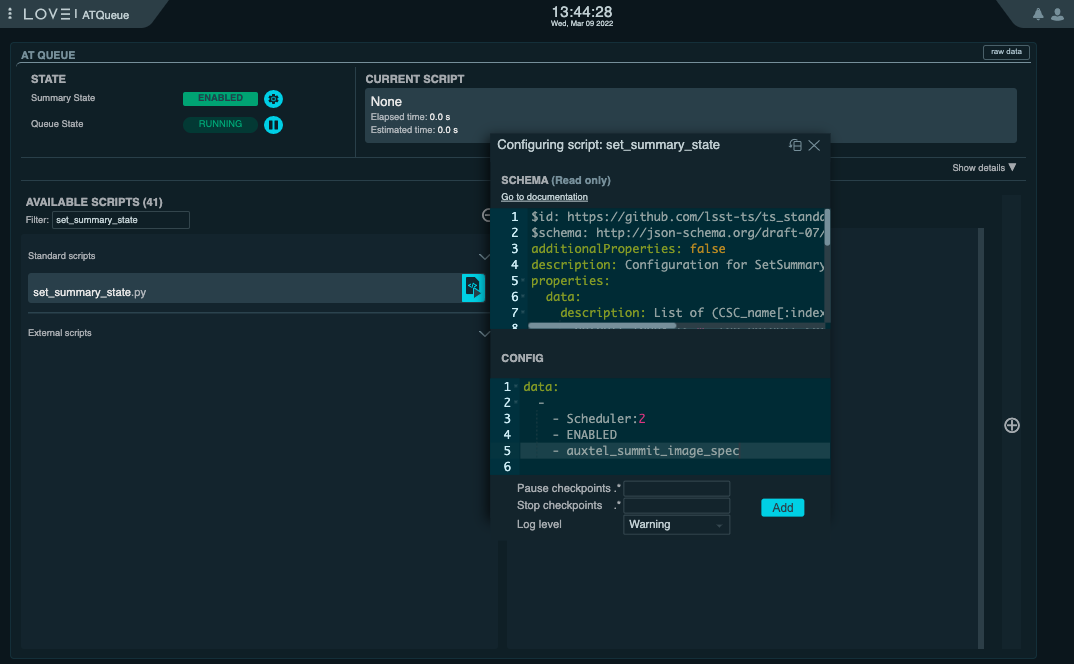
Setting log level of the AT Scheduler from the ATQueue view on LOVE
From nublado, one would do:
await salobj.set_summary_state(remote, salobj.State.STANDBY)

await salobj.set_summary_state(remote, salobj.State.ENABLED, settingsToApply="auxtel_summit_image_spec")
As mentioned above, these will send the CSC to STANDBY first and then to ENABLED, respectively, thus guaranteeing it is configured with the expected setting.
Note
The configuration selected above is auxtel_summit_image_spec.
This will likely change depending on the campain in question, not to mention that it is definitely not suitable for MT.
As mentioned before, make sure you know ahead of time which configuration should be used for the particular run.
Final Remarks
The Scheduler ENABLED State
Once the CSC is in ENABLED state it will continuously monitor the observatory state, updating its internal model and publishing that information through observatoryState telemetry.
If, for any reason, the Scheduler can not determine the observatory state, the CSC transitions to FAULT with error code 500.
Below we show an example Summary State view where the AT Scheduler went to FAULT because the ATPtg is in STANDBY.
The same view with the expanded Scheduler components is also shown, displaying the associated error message.
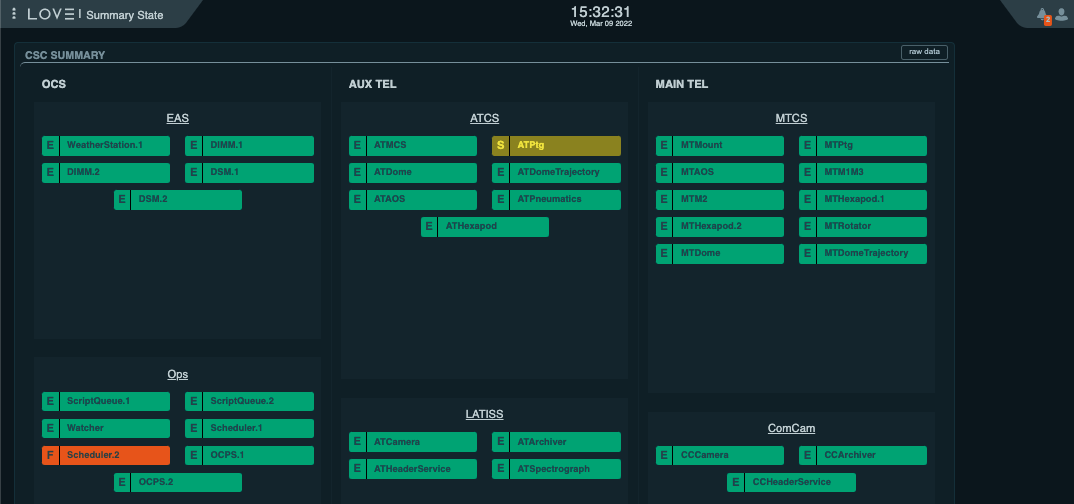
Summary State view showing the Scheduler in FAULT with the ATPtg in STANDBY
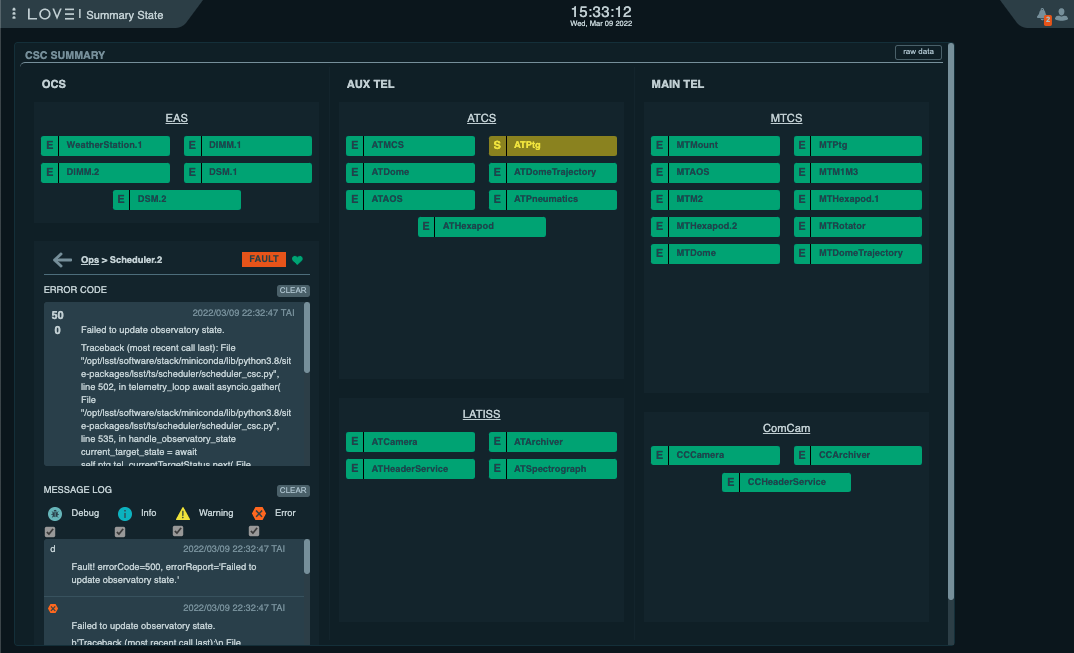
Summary State view showing the Scheduler in FAULT with the ATPtg in STANDBY.
In this case the Scheduler component was expanded (by clicking on the Scheduler “icon”) to show the error code and log information.
Initially the CSC will not do anything else, so it is safe to enable it at any time, so long as the componentes required to determine the observatory state are also enabled.
Those are the MTCS and ATCS componentes for the MT and AT Scheduler, respectively.
The scheduling algorithm initial state
During the startup procedure, the CSC configures the scheduling algorithm with an empty initial state. That means, the algorithm has no knowledge of previous observations taken with this or any other configuration.
The Scheduler CSC provides a couple different mechanism to rebuild the desired state of scheduling algorithm; “warm start” and “hot start”.
When performing a warm start, the CSC will read a database with previous observations and will register these observations on the scheduling algorithm, essentially replaying the observations. This will be, most likely, the mode users at the beginning of the night during commmissioning and operations. Unfortunately, at the time of this writting this mode is still not implemented.
When using a hot start, the Scheduler CSC replaces the currently scheduling algorithm by a snapshot provided by the users. This snapshot can be either one previously generated by the Scheduler CSC or one that the user manually crafts and customizes locally. For now hot start is the only additional initialization mode available, besides the default initialization.
How to execute a hot start will be covered in more details in Scheduler Night-time Operation.